I mentioned earlier about my own bonsai soil mix. This isn’t as scientific as it first sounds. As many of you may already know bonsai enthusiasts throughout the world have been turning to cat litter (kissanhiekka) as an inorganic soil alternative to Akadama. Akadama is expensive and can be difficult to obtain here in Finland, often only available by mail order from another country. Cat litter is of course much cheaper and can be purchased from any supermarket. I have tested a couple of brands to establish if it retains its shape when wet and frozen and found that the brand ‘Rainbow Kevyt Kissanhiekka’ is the best cat litter that I have come across at the moment.

I have used this cat litter for over a year for all my bonsai, indoor and outdoor, without any problems. The soil mix can be 100% cat litter if you require, but you can also mix it with other ingredients for specific tree types or to suit your own personal preferences. For example you can add some grit for a drier mix used on pines, junipers etc. or some pine bark to retain more water.

When using any material for bonsai soils it is important to remove the small particles and this is also the case with the cat litter. I have found with the brand that I am using that the largest particles are ok and remain in my mix but I sieve out the smaller particles less than 2mm. These small particles are not needed in the mix, as they will not allow the water to run through as easy.

My own bonsai soil mix has been made up of roughly 50% cat litter and 50% pine bark. The pine bark is also purchased from any local garden centre and then I run this through an old food processor to cut into smaller pieces. Again, as with the cat litter, I sieve out the smaller pieces and this time also remove the larger pieces that are bigger than 5-6mm. This bonsai soil mix I have used especially on my indoor bonsai because it helps to extend the time between watering that can be problem if using 100% cat litter.
Two of the most important tasks that need to be performed correctly for your bonsai to grow, watering and feeding, have been made easier by using cat litter.
WateringWatering of my bonsai was a job that was a little difficult to understand in the beginning with questions like How often should I water? and What different watering schedules are needed for different trees? All this is now history when using cat litter. If required I could water my bonsai everyday, this can easy be the case in the summer, without any problems because any excess water not retained by the cat litter simply runs out the holes in the bottom of the pot or container.
FeedingThe use of cat litter has also changed how I feed my bonsai. As with the watering I was constantly reading about different feeding systems for different types of trees, but now I feed during the growing season every 10-14 days with a balanced feed knowing that the daily watering regime during this period will wash away any excess fertilizer before the next dose.
ConclusionCat litter is a cheap, easily obtainable alternative bonsai soil that will help to keep your bonsai growing vigorously with regular watering and feeding regimes.

 At least the more snow helps to cover my Pine trees. I have not completely covered them because they are also positioned close to my house, even though I could easy do so with the amount of snow that we have had.
 The deciduous trees are still in my garage on the heater bed. I have had this on a couple of times to relieve the temperature a little, but the good thing is that the garage is keeping the temperature some 8-10°C warmer than the outside temperature. As you can see I have placed some snow on the pots which will slowly melt into the soil to prevent the soil from drying out.

 The pines, as with all evergreen species, require some light during the winter period as photosynthesis still takes place. I moved the pines closer to the house to get some protection from any strong winds, we could get during the winter, and to remove them from the direct sunlight that we can easily get on a nice winter's day. Exposure to direct sunlight during periods of sub-zero temperatures can cause damage.
 When the first heavy snow fell I covered the boxes that the trees are planted in with the snow. This helps to keep the temperature under the snow a little higher than the actual outside temperature and protect the trees from any heavy frost. Now we wait patiently for spring to see if all of these various techniques for protecting the trees during the winter period have paid off.
 Step 2. Thermal insulation material
 Step 3. Heating cable
 Step 5. Placing the trees
 Trees grow in these trenches which are cut each year by the verge cutters that come along to cut the grass and weeds. The continual cutting of the tops of the trees produces thick trunks that is the heart of any bonsai.
 Any type of common tree in our area can be found growing in the trenches as shown in the photos. The most common tree in the photo was Aspen (Populus Tremula) but there was also a Scots pine.
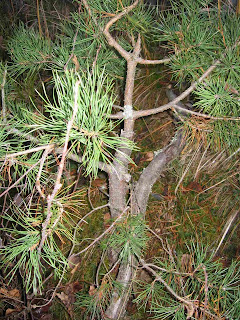 I know that Aspen is not a common tree for bonsai material, but if nothing else it will allow me to continually improve on my bonsai skills. Now we wait for the spring to see how some of these trees look when removed from the ground.
 This is the same tree I purchased from Bauhaus that will need an immediate repot next spring, but you can already see that in a few years once the canopy has developed further this should be a nice tree.
 This was located on the side of a rock and again the roots were all on the surface of the rock, making it easier to collect. Bringing along as many roots as possible, not forgetting the Mycorrhizal fungi, helps to make the survival rate of pine trees higher.
 The photos below show the sort of location that these potensai can be found. Places exposed to the weather where the wind can blow strongly and the tree is attached by only a little soil are ideal conditions for nature to make the sort of tree bonsai enthusiasts are interest in.


 Posts
Posts


