
I have a garage where I place the deciduous trees that will protect them from the frost and the cold wind, which is one of the main culprits for killing the tree because the wind can dehydrate the tree during this period of dormancy, but this does not protect them from the really cold temperatures. The garage already keeps the temperature a few degrees higher than the outside temperature and in general temperatures down to -10°c are ok but anything more than -10°c it is advisable to provide some extra protection. The garage has electric floor heating installed but this costs a fortune to keep on, as I found out to my horror last year when the electric bill arrived, so this year I thought I would build a small heater bed for the trees to sit on that I can put on when needed without costing a fortune.
The heater bed consists of a wooden frame with a thermal insulation base on top of which are two layers of sand. Sandwiched between the layers of sand is a heater cable attached to a metal grid.
The following photos show the step by step build of the heater bed.
Step 1. Wooden frame
A wooden frame was made as shown in the image below. The size of the frame was approx 120x60cm. The width of the frame matched the width of the thermal insulation material I would use. I attached a large sheet of plastic to the sides and bottom to help to retain the sand from falling through.
 Step 2. Thermal insulation material
On top of the sheet of plastic I placed a piece of thermal insulation material. This material is about 4cm thick and very stiff. I could of used some type of board to form a firm base to hold the sand but this is what I had available and I thought it would help in maintaining some of the heat.
 Step 3. Heating cable
The heating cable, which can be obtained from a local electrical shop, is specially designed to be used outside and for keeping things warm. Normal use of this cable is to warm water pipes, either the main water coming into a house or attached to drain pipes to prevent the water from freezing during the winter. The temperature output of the cable is approximately 10°c and uses 10 watts per metre. The length of cable I have used is 10m meaning that the power consumption is 100 watts. The cable is attached to a metal grid the size of the area with cable ties. I attached the cable on both sides of the metal grid at equal distances to try to get an even distribution of the heat. The cable is already fitted with a standard electrical plug as seen in the bottom of the image.

Step 4. Sand
The finished cable was taken out of the frame and a layer of sand approximately 2-3cm deep was added on top of the thermal insulation material. I then placed the cable on top of the sand and then proceeded to add more sand to cover the cable. I was not sure how much sand I needed so I started with another 2-3cm. The reason I wasn’t sure how much sand to add on top of cable was because I didn’t know how warm the sand would get when there was power to the cable. I wanted the sand to get warm but not to too warm and even though the temperature output was only 10°c the fact that I had looped the cable close together meant that the combined temperature could be more than that. As it turned out the difference between the ambient temperature and the temperature at the top of the sand was about 10°c. Because I am planning to use this heater bed only when the temperature is really cold the sand will never get above the magic temperature of +10°c, temperature that would start to represent that spring was here, so this difference is fine. If the temperature had been too high I would have simply added more sand to absorb more of the heat. In the image below you can see a thermostat to the left hand side. The thermostat takes the ambient temperature and a sensor, normally used to take the outside temperature, is inserted at the top of the sand to give some indication of the temperature of the sand.
The finished cable was taken out of the frame and a layer of sand approximately 2-3cm deep was added on top of the thermal insulation material. I then placed the cable on top of the sand and then proceeded to add more sand to cover the cable. I was not sure how much sand I needed so I started with another 2-3cm. The reason I wasn’t sure how much sand to add on top of cable was because I didn’t know how warm the sand would get when there was power to the cable. I wanted the sand to get warm but not to too warm and even though the temperature output was only 10°c the fact that I had looped the cable close together meant that the combined temperature could be more than that. As it turned out the difference between the ambient temperature and the temperature at the top of the sand was about 10°c. Because I am planning to use this heater bed only when the temperature is really cold the sand will never get above the magic temperature of +10°c, temperature that would start to represent that spring was here, so this difference is fine. If the temperature had been too high I would have simply added more sand to absorb more of the heat. In the image below you can see a thermostat to the left hand side. The thermostat takes the ambient temperature and a sensor, normally used to take the outside temperature, is inserted at the top of the sand to give some indication of the temperature of the sand.
 Step 5. Placing the trees
We have been blessed that during November and the beginning of December the temperature had been quite warm for this time of year with temperatures even reaching +8°c on some days. But as can easily be the case here in Finland the winds change direction and we go from +2°c to –12°c overnight. This happen one night a couple of weeks ago and then that was the time to move the trees inside the garage and on to the heater bed. I didn’t actually turn the heater bed on because the garage was protecting the trees from the frost and the ambient temperature was only -6°c. Winter really started to come after this day with daily temperatures of –10°c to –16°c. During one of these days I turned on the heater bed as the temperature inside the garage was now –9°c. The out come was that the sand warmed to a nice temperature of +2°c. Perfect to keep the toes (roots) warm of my small collection of bonsai (potensai).

 I have used this cat litter for over a year for all my bonsai, indoor and outdoor, without any problems. The soil mix can be 100% cat litter if you require, but you can also mix it with other ingredients for specific tree types or to suit your own personal preferences. For example you can add some grit for a drier mix used on pines, junipers etc. or some pine bark to retain more water.
 When using any material for bonsai soils it is important to remove the small particles and this is also the case with the cat litter. I have found with the brand that I am using that the largest particles are ok and remain in my mix but I sieve out the smaller particles less than 2mm. These small particles are not needed in the mix, as they will not allow the water to run through as easy.
 My own bonsai soil mix has been made up of roughly 50% cat litter and 50% pine bark. The pine bark is also purchased from any local garden centre and then I run this through an old food processor to cut into smaller pieces. Again, as with the cat litter, I sieve out the smaller pieces and this time also remove the larger pieces that are bigger than 5-6mm. This bonsai soil mix I have used especially on my indoor bonsai because it helps to extend the time between watering that can be problem if using 100% cat litter.
 Trees grow in these trenches which are cut each year by the verge cutters that come along to cut the grass and weeds. The continual cutting of the tops of the trees produces thick trunks that is the heart of any bonsai.
 Any type of common tree in our area can be found growing in the trenches as shown in the photos. The most common tree in the photo was Aspen (Populus Tremula) but there was also a Scots pine.
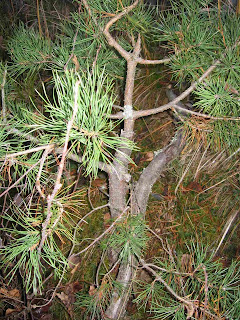 I know that Aspen is not a common tree for bonsai material, but if nothing else it will allow me to continually improve on my bonsai skills. Now we wait for the spring to see how some of these trees look when removed from the ground.
 This is the same tree I purchased from Bauhaus that will need an immediate repot next spring, but you can already see that in a few years once the canopy has developed further this should be a nice tree.
 This was located on the side of a rock and again the roots were all on the surface of the rock, making it easier to collect. Bringing along as many roots as possible, not forgetting the Mycorrhizal fungi, helps to make the survival rate of pine trees higher.
 The photos below show the sort of location that these potensai can be found. Places exposed to the weather where the wind can blow strongly and the tree is attached by only a little soil are ideal conditions for nature to make the sort of tree bonsai enthusiasts are interest in.

 The tree was found on top of a hill and completely exposed to the elements. There was not much soil around the tree and, fortunately for me, all the roots were growing on top of the rock that made up the hill.
  Once it was collected and back home I made the wooden box, I have learned that planting the tree back into the ground is not the best solution long term, that will be it's home for the next 2 years. I started immediately feeding the tree and continued to feed every 2 weeks with a balanced soluble feed. This it seemed to like because new needles started to appear in many areas, even areas that were almost without any needles. Now I need to nurse it through the winter and then wait patiently for next spring to see if I have learned something from my many hours of studying.
 The only problem is that the soil the tree is planted in is quite heavy. Ideally this should be changed to allow me to water and fertilize the tree like the others I have in my collection.
 Unfortunately this isn't the time of year to start repotting trees. I will take extra care of this tree during the Autumn and Winter months, especially with the watering, until I can change the soil in the spring.
 I have earlier had fukien tea trees and they have all died. I think this was mainly due my reluctance then to change the soil fearing that I would kill the tree that was growing so well at the time.
 The bougainvillea was planted into this pot in the spring. I have yet to decide how I want this bougainvillea to look so I have allowed it to grow and only cut back the long shoots once they have reached approx. 5-6 nodes.
 I repotted these figs in the spring. The roots were quite tangled together being potted in the same pot, but I managed to separate them enough to plant in this pot. The figs now need some wiring to improve the look, this I will do in the next couple of weeks.
 When I dug this up from the ground I had already decided that I wanted to place the exposed roots over a rock. I used clear cellophane to wrap the roots to the rock and separate this area from the soil so that the roots would grow downwards. I then planted the tree and rock back into the ground.
 I also buried a slab in the ground and placed the tree on top of this slab to force the roots to now grow sideways once they were out the bottom of the cellophane.
  The image above shows the portion of the tree that I have planned to keep. This will mean that I will remove the long branch from the final design. I have left this to grow at the moment as this was the only section that had leaves plus it helps to thicken the truck and roots while allowing the tree to grow unrestricted.
 The size of the leaves are quite big and I am told that they are not easy to reduce, but I will at least work on them and let's see what happens. If nothing else it will be good practice doing the normal tasks (trimming, pruning, repotting etc.) that is required to make a normal tree into a bonsai style.
 The tree below is possibly the variety "Crimson King" which has dark purple leaves. Believe it or not the tree had been the ground the same amount of time as the above two maples but has only grown 10 cm in height.
 All these trees were removed from the ground in October 2008 and potted into these pots. I understand that this would not be recommended to do so late in the season, but it was either that or leave them for the new owners to maybe dig up and destroy anyway.
 This tree is probably not one of the best trees to have as a bonsai because the size of the leaves are quite big, but it was the truck that attracted me to this tree. Good nebrei can also be seen which is always an important aspect of making a good bonsai.
  What attracted me to this maple was the thick trunk and exposed root. The original height was over 1/2 metre and the was reduced at the end of last year. The tops of the branches can still be seen through the leaves. These will be further reduced or removed completely once all the leaves have fallen and I can have a better idea how the new branches are forming.


